
I needed a DIY glowing embers effect (DO IT YOURSELF) for my new escape room and this one had me stumped for a while. After some internet searches I pieced together enough information to figure out how to do it for my needs.
The first thing I needed to do was decide the size I needed. I decided on something about 12×18 inches. A smallish campfire.
THE BASE
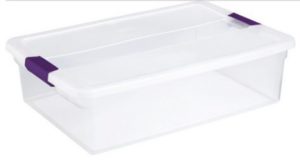
For my base I went to target and got a clear storage container that fit my needs. It was about 3 inches deep and a 12×18 rectangle. I forgot to get an image but this is the one I got.
THE FOAM FOR EMBERS
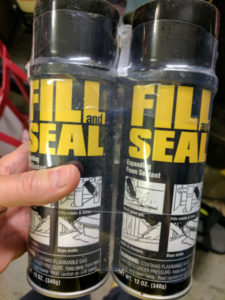
Next I used a can of expanding, spray foam. You can find this at your local home improvement store. There are several different types depending on your needs. For this sort of thing most any of them should work fine.
PUTTING THE FOAM ON THE BASE: ATTEMPT 1
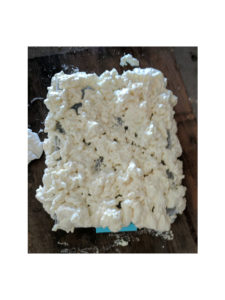
You should wear gloves when you use this stuff. It’s very sticky and can get everywhere. Turn your base upside down and spray the foam on your base. You’ll probably want to experiment a little because you don’t know how much this stuff is going to expand until you try it. You really don’t need that much. The first time I tried it it looked like a bunch of worms in a pile, not at all what I wanted.
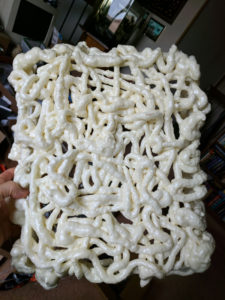
Note that I was able to pull this off of my container base once it dried. I wasn’t planning on that but it turned out to be very handy.
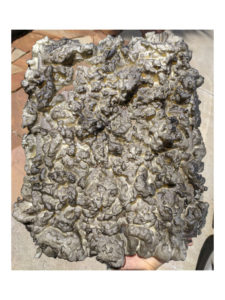
PUTTING THE FOAM ON THE BASE: ATTEMPT 2
After a few different experiments I realized I need to mush up the foam after it is applied so that it doesn’t remain in tubular shape. This is why you need gloves. Spray the foam on your base and then lightly pat it with your gloved hand. It will stick to the glove but just pat it down until you don’t see the tubular forms. It should be very uneven so don’t try and smooth it out or make it consistent.
Here is what my second attempt looked like after it dried.
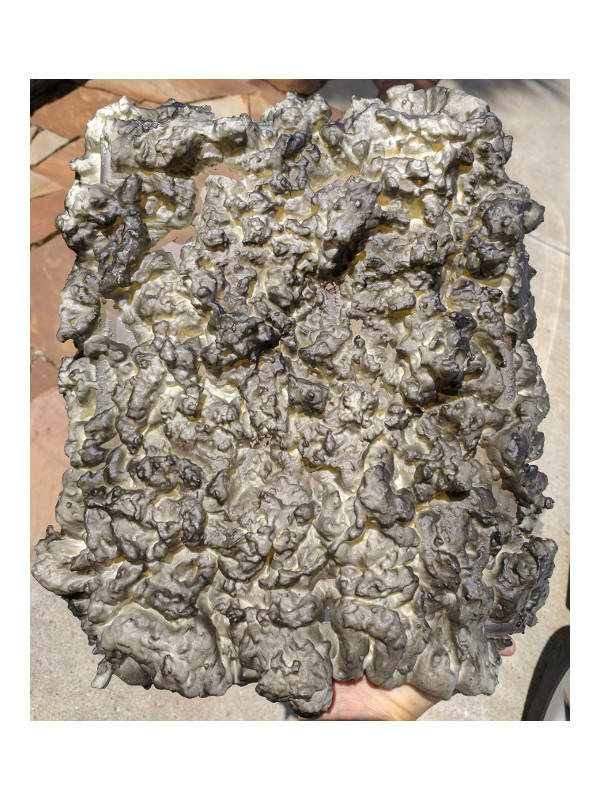
SPRAY PAINT THE EMBERS BLACK
Once I was happy with the look of my embers I took black, matte spray paint and painted them. Again, don’t try and cover every inch. The black should be spotty and uneven.
MAKING THE EMBERS GLOW
Finally you’ll want your embers to glow. I used a string of LEDs that can be controlled by an Arduino because there are various things about these embers that I don’t want to give away here (you’ll have to come visit The Entrapment), however you can really use just a string of orange or red Christmas or Halloween lights. They have little battery powered strings that work well.
Here is a link to the ones I used in case you are interested. LED Lights
Put your lights inside the container (this is why you turned the container upside-down and put the foam on the bottom).
Because I used these controllable LEDs I was able to get a nice pulsing, glowing effect. Here is a short video of the finished embers.
I hope you enjoyed seeing how to make some cool looking glowing embers. These are great for Halloween decorations too. For my first try at doing this I was very pleased with how they turned out.
Thanks for reading and stay tuned for my next DIY escape room project.