

Hello again! It’s been a while but I’ve been furiously trying to finish up The Bayou and have not had much time. But recently I created some stalactites to hang from the top of a cave and I thought I’d show you how I did it since halloween is just around the corner and it’s a very cool decoration.
So let’s get to it.
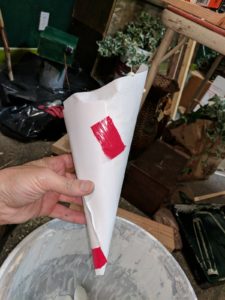
Step 1: Roll up paper into a cone

You should create various sizes: thick, long, thin, etc.
Tape the paper cone to hold it’s shape. I used duct tape because there will be a little bit of pressure on it.
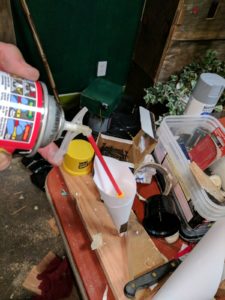
Step 2: Fill the cone with expanding foam
We are back to using my favorite expanding foam. I use whatever can is cheapest and you can find it at your local hardware store.
Spray in enough foam and leave it about an inch or two from the top to leave room to expand. It’s okay if you put in too much as it will just expand out the top and we will cut it off later. Be sure and fill down to the small end. I put a squirt of foam in from the small end just to be sure.
Step 3: Let it dry overnight
Let the foam sit overnight. I just laid them down on a piece of plastic, just in case the foam expanded out of the end. The foam will feel dry after just a few hours but don’t be fooled. The inside will still be gooey and sticky so wait overnight.
It looks shiny and glossy and all expanded the next day.
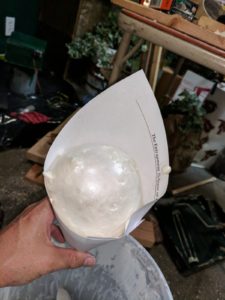
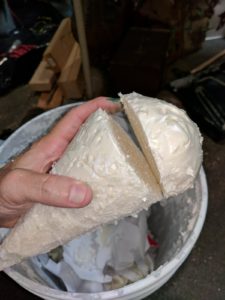
Step 4: Peel off the paper
This isn’t as easy as it sounds because the paper sticks. Peel off what you can and then use a serrated knife and carefully cut off the remaining paper. I found a serrated knife, like a steak knife, works better then just a plain blade. Don’t be afraid to cut off a thin layer of the outer foam as you cut off the paper.
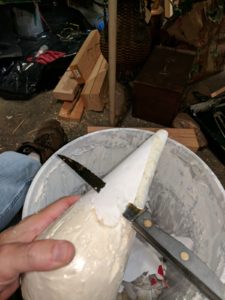
Step 5: Cut off the top to make it flat
Now cut off the top of the cone. In this case it has made a nice, rounded dome as it expanded, but sometimes they expand all crazy and form all sorts of odd shapes. You need a flat surface to attach it to the ceiling so cut it flat.
Be sure and cut it flat. Just set it on the ground on the flat end and make sure it stands straight up. If you cut it at an angle it will hang down at an angle and doesn’t look as real.
Step 6: Put some foam on the top and then stick it
Put a little bit of the same expanding foam on the flat part of the cone and then stick it to whatever you are going to stick it to. Wait a minute or two after putting the foam on to let it get a bit gooey. Don’t put too much on. Remember, it is going to expand.
And finally stick it to whatever you are going to stick it to. In my case, the ceiling of a cave.
I found that when you stick it you may have to hold it for a minute or two. And even then, a few of them fell off about 5 minutes later. If that happens just quickly stick it back on. By then the foam is really gooey and it seemed to stick better the second time.
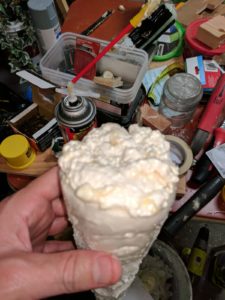
Step 7: Final details
Once they are dried and stuck on really well, I took a little more foam and kind of rubbed it on the sides. This gave the otherwise smooth sides (since we did carve them) a little bit of texture. I wore a latex glove, sprayed a little foam in my hand, and then patted it on the sides of the cone. You can also do this at the end of step 5 if you want, before sticking it to the ceiling.
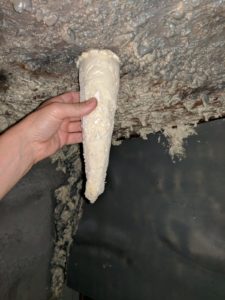
Finally paint your stalactites. Be sure and let them dry again if you put on some texture foam. I used spray paint and started with a few shots of black. Not much, just a little here and there. Then I covered it with two shades of grey. Make sure the black shows through, as well as some of the foam color. I then used some glossy, pale blue and some gold in small squirts of paint on one side or another, to give them a little “mineral color” and make them stand out.
Here’s an “almost complete” picture. I used more gray paint after this to make the blue around the top fade into the grey better instead of looking like a circle of blue. I don’t have a picture of that, but you get the idea.
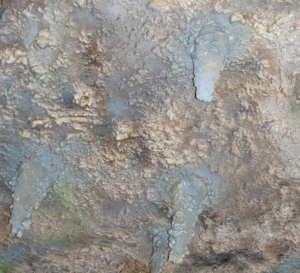
And that’s it. An easy and inexpensive way to make stalactites for a cave.
If you’re in San Diego be sure and come visit The Bayou at The Entrapment escape room.